Link: http://www.gamemaps.com/details/21159
http://steamcommunity.com/sharedfiles/filedetails/?id=1691668252
Author: Chen Chen
Survivors: L4D2
Notes: This campaign is only enjoyable if you enjoy unconventional puzzle maps, you're good at the game and knowledgeable of all the mechanics, have a high tolerance for bullshit, and you have friends to play with. If you don't match all of the criteria above, you're likely to have a bad time.
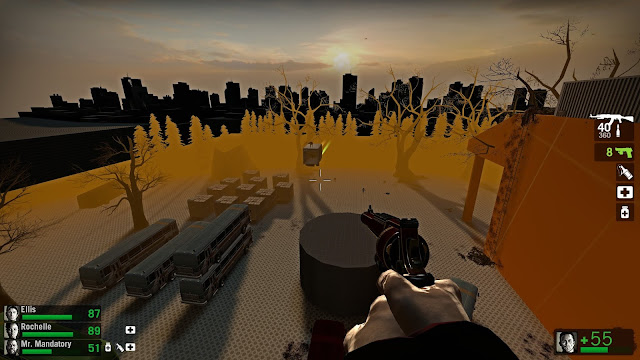
As I mentioned above, you should only try this campaign you like enjoy unconventional puzzle maps, you're good at the game and knowledgeable of all the mechanics, have a high tolerance for bullshit, and you have friends to play with. That being said, I did try this with a friend (and for the hardest map, two friends) so the pain was alleviated a fair bit. In general, the campaign is slightly easier than the others aside from the third map. The first map takes place on a small set of platforms created by floating vehicles. In typical hehe fashion, a couple of tanks will spawn once you leave the starting area, and honestly this is a decent warm-up if you've played the other hehe campaigns. Thankfully this only spawns two tanks, which are more than manageable. The witch in front of the saferoom poses a challenge if you're playing alone, and as usual, another tank will spawn inside the saferoom once you open the door, but it's the only saferoom that does this. The best plan of attack is first to put enough distance between the players and the tanks to take them out before getting close to the saferoom. Then either take out the witch first (by crowning or molly-staggering because a horde will appear, preventing melee-staggering and sniper-staggering) or let the sacrificial player open the saferoom door and startle the witch to at least allow the other players get inside.
The fourth map is another rehash of another map by this author, which I can't place right now. However, it's much the same, if not exactly identical. There's actually a map layout here and you have to make progress through this decently spaced map while fighting tanks one at a time, about six in total. The hardest part here is actually staying stocked with ammo as there isn't any in this map. This map is easier than the previous but its challenge is in conserving ammo and dealing with hordes and tanks with few resources, so I recommend relying on secondaries unless you absolutely have to use your primary.
The fifth map starts you at the top of a large building, and heading out of the starting room puts you with a direction to kill seven witches in order to open the path to the saferoom. This map is huge because it has a ton of floors you need to search in order to find highlighted witches that you need to press "use" on in order for them to count. There are also regular witches in here too, but not many. This is more of a pain in the ass than fun, since you're searching a very large number of rooms for these witches, so hopefully you're in voice chat with friends or listening to music to pass the time.
The sixth and final map is the one from the cover image. Thankfully it's just a regular holdout in a somewhat normal, large spot. This is actually kind of interesting, if somewhat not utilized to its fullest. The obvious holdout spot is after climbing a ladder, camping on top of the building, overlooking the large area on the bottom. There are two waves before the rescue vehicle arrives, but once it does, the challenge is then in climbing back down the ladder, since tanks and large waves of infected will start climbing it. The best idea is to either make sure everyone gets down quickly after the second tank's death or kill any tank climbing up and then throw a molotov at the base to prevent infected from climbing up. The waves of infected after the rescue vehicle arrives is very high so the bots will almost assuredly not make it.
Final Verdict: This is one of the better hehe campaigns. Since I've played them all so far, I knew what I was getting into, and this delivered what I came to expect. It's definitely beatable although the third map is such a pain in the ass that I wouldn't try to go through it alone. If you can scrounge up other players who enjoy the kind of weirdness of unusual gameplay-focused campaigns that have no sense of real progression through consistent environments, then you could do worse than start with this one. In the grand scheme of things, the look and design here are decent enough, although the second and fifth maps really drag the gameplay down from the adrenaline rush of the first and third maps. Also since this recycles two maps, I'm not really sure how much else is totally original here. There's just enough normal gameplay as to not be too off-putting for beginners but those who are looking for campaigns like the original ones from the base Left 4 Dead games, look elsewhere.
Rating: 2.6/5.


No comments:
Post a Comment